

Jigsaw Effect Style
24 posts
• Page 2 of 2 • 1, 2
- anitaemile

-

- Posts: 767
- Joined: Wed Apr 15, 2009 9:51 am
- Location: Dutch in Michigan
Re: Jigsaw Effect Style
![]() by anitaemile » Mon Aug 16, 2010 2:46 pm
by anitaemile » Mon Aug 16, 2010 2:46 pm
Peter,
If you keep the image and the mask the same size:
Pull the mask to where you want to start, with y pan on 0 ( to follow a straight line) for kf 1 after you set center of rotation at -40x-35 for piece 1 for kf 1 and kf2 and apply whatever x pan and whatever rotation. Duplicate mask and exchange for image.
Piece 2 would have c.o.r at -20x-35
piece 3 c.o.r 0x-35,
piece 4 c.o.r. 20x-35 etc.. This will have them move in a straight line, rotating over the axis of the piece and since image is the same size with same settings it will follow. Straight line. Is that how you wanted them to move?
PS you can also drag the masks and images to different y pan for kf 1 , to follow a straight line, ( it not being it a straight horizontal movement)


Re: Jigsaw Effect Style
![]() by im42n8 » Mon Aug 16, 2010 4:15 pm
by im42n8 » Mon Aug 16, 2010 4:15 pm
Your image and mask do not have to be the same size but if they're close, it helps alot! (e.g., they fill the frame either with Fit to Frame or Fill Frame ... and they both fill the frame, for example). Since they're both relatively the same size and the opaque puzzle piece is always going to be over some segment of the image being masked if you change the opaque region's center of rotation to be in the center of the opaque area, you can make the center of rotation of the mask and masked layers be the same point. The masked layer will rotate slightly differently than the mask but nobody is going to notice it's not exact.
Since the puzzle pieces in this particular case are all going to end up at 0,0 when all movement is complete, the offset for the image from the mask is going to be 0,0.
Had the final position of the mask been other than 0,0 and you were using pan following AND the mask was made smaller than the masked layer, then you would want to offset the image from the mask as given in the earlier post (that is, if the mask ends up at -12.5,12.5 then the masked image will use an offset of 12.5, -12.5 added to its position at any time. So, if you follow the pan-x of the masked layer you will only need the default two keyframes, a modifier that follows the masked layer for all keyframes, and the pan-x offset of 12.5 for both of the masked layer's keyframes. This way, the same point of the image will always be under the same point of the mask.).
So, since the image center of rotation (COR) won't be all that different from the COR for the mask in this case, it means you can use a pan, rotation, and COR follow without a problem (i.e., modifiers).
This means you can use straight line or curved or whatever path you define for the mask and the masked layer will follow. The path of the mask can use sine or cosine or triangle w/o a problem or any other set of defined points and the masked layer will follow easily w/o you needing to adjust its position when you adjust the mask position. This makes it much easier to define the paths for your puzzle pieces. The modifiers allow you to fore-go making mirror position, rotation, rotation center changes, and keyframe changes to the masked image that you made for the mask layer.
The use of a modifier on these masked layers is straight forward. Right click over the desired box (pan-x, pan-y, zoom-x, zoom-y, rotate, rotation center-x, or rotation center-y), add modifier, set the "Variable Amount Based on" to the same type as the selected keyframe box, (ie, pan-x, pan-y, zoom-x, zoom-y, rotate, rotation center-x, or rotation center-y), and select the "FROM" as the mask layer (which should be the layer immediately above the masked layer). Make sure "Apply To" is "all keyframes" and don't change "multiplied by" (leave at 1). Then click on OK. Repeat for each box and then start playing with the positioning of the mask layers. Drag the mask wherever you want it to begin (adjust as necessary) its movement for kf1 and do the same for the last kf (that is, set it for 0,0)
BTW, if you use Zoom-x or zoom-y, don't forget to add another action to the follower layer's modifier. It will be a subtractive constant of -100. Then, the maximum amount of zoom on the layer being followed is what you'll need to make as the zoom amount for all of follower layer's zoom keyframes.
Dale
Last edited by im42n8 on Fri Aug 20, 2010 12:10 pm, edited 1 time in total.


Re: Jigsaw Effect Style
![]() by mulawa1 » Mon Aug 16, 2010 9:48 pm
by mulawa1 » Mon Aug 16, 2010 9:48 pm
Wow Anita! Slavishly followed your numbers (although it's 33.33 not 35) and it worked perfectly. Thanks for your patience.
Where I was going wrong was changing the COR from KF1 to KF2 - I hadn't realised they have to be the same - not sure why but it works.
And thank you too to Dale for all your efforts - I must be a great disappointment the way I can't seem to follow what you're trying to tell me.
Looking forward to advancing my style to the next stage and then I'll look at getting a 3D effect.
Peter
PS Of course my modifier idea failed because it was changing the COR.
Re: Jigsaw Effect Style
![]() by Ron » Mon Aug 16, 2010 10:51 pm
by Ron » Mon Aug 16, 2010 10:51 pm
Hi All
Great thread Peter, very informative!!
Anita / Dale great discussion.
Thanks
Great thread Peter, very informative!!
Anita / Dale great discussion.
Thanks
"Family over Friends" "Night over Day" "Nikon over Canon" "Gravy over Everything"
Re: Jigsaw Effect Style
![]() by mulawa1 » Mon Aug 16, 2010 11:04 pm
by mulawa1 » Mon Aug 16, 2010 11:04 pm
And ... I've just answered my own "Why?" ... the COR is always relative to the image i.e. it uses relative co-ords not absolute. So the COR travels with the image. Logical when you think about it 
Peter
Peter
Re: Jigsaw Effect Style
![]() by im42n8 » Tue Aug 17, 2010 5:44 am
by im42n8 » Tue Aug 17, 2010 5:44 am
Peter,
If you keep at it, the stuff presented here will, in the not too distant future, seem relatively simple to you. For now tho, it might seem above your head. But by keeping on plugging, it'll start making a whole lot more sense soon. The more you learn, the more you find out you still have to learn! The finer details of this program are not learned overnight!
Other related things to keep in mind as you work through this stuff:
Movement and zoom related references are frame relative (that is, the layer relative to the frame). Rotation related references are layer relative as are adjustments (the frame isn't a consideration). For the most part, everything is done in percents except for rotation. For rotation, the amount of a layers rotation is given in degrees except in a modifier where it's a percent of a full rotation.
-Dale
Re: Jigsaw Effect Style
![]() by mulawa1 » Tue Aug 17, 2010 6:02 am
by mulawa1 » Tue Aug 17, 2010 6:02 am
Ok - all done!
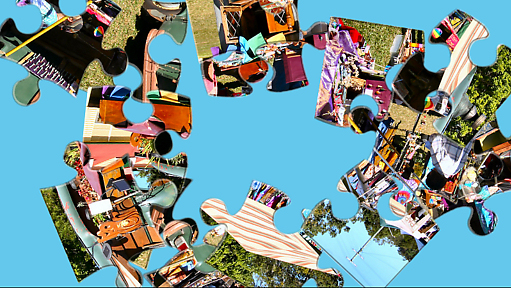
Added another mask layer to give me the 3D effect which means each piece has three layers:
1. the piece mask
2. the 3D effect mask
3. the picture
I set the panx, pany, rotation, cor x, cor y in layers 2 & 3 to use layer 1 via modifiers - this means that when I adjust the piece location, the others automatically align - a lot of work to set up but a great time saver when done.
I won't be publishing the finished style because Anita already has an excellent one available at
http://outsidethebox.name/pagina2.html
I hope readers of this thread have got as much out of it as I have!
Peter
- anitaemile
-
- Posts: 767
- Joined: Wed Apr 15, 2009 9:51 am
- Location: Dutch in Michigan
Re: Jigsaw Effect Style
![]() by anitaemile » Tue Aug 17, 2010 6:16 am
by anitaemile » Tue Aug 17, 2010 6:16 am
You got it! Congrats..
I watched your provided style(s), and I can only give you one more tip: You have just two kf. in your slide. If you bring all second kf's back to , say, 6 seconds in your 15 second slide, you can add another kf af the end (kf3) . Where the pieces fall together ( kf 2) you can add the image layer as (first) top layer and add a transition to it's first kf to have the puzzle gradually blend into the image. This is now a style, since you have all actions in just one slide .
You were smart not to us a 50 piece puzzle, since this would have made it impossible to work with, having 150 layers in your slide ..
I watched your provided style(s), and I can only give you one more tip: You have just two kf. in your slide. If you bring all second kf's back to , say, 6 seconds in your 15 second slide, you can add another kf af the end (kf3) . Where the pieces fall together ( kf 2) you can add the image layer as (first) top layer and add a transition to it's first kf to have the puzzle gradually blend into the image. This is now a style, since you have all actions in just one slide .
You were smart not to us a 50 piece puzzle, since this would have made it impossible to work with, having 150 layers in your slide
Re: Jigsaw Effect Style
![]() by mulawa1 » Tue Aug 17, 2010 1:15 pm
by mulawa1 » Tue Aug 17, 2010 1:15 pm
Thanks Anita.
You are quite right about KF3 but I chose the two style approach so that the user has ease of control over the speed of the assembly and the transition. I notice that Photodex uses this approach in some of their supplied styles.
Peter
You are quite right about KF3 but I chose the two style approach so that the user has ease of control over the speed of the assembly and the transition. I notice that Photodex uses this approach in some of their supplied styles.
Peter
24 posts
• Page 2 of 2 • 1, 2
Who is online
Users browsing this forum: No registered users and 5 guests